5 steps to a style update: Schlage interior door hardware installation

Blog

Your browser is out of date

This website will not look or function as originally intended in your current browser

We recommend upgrading to the latest version of Internet Explorer or Chrome or Firefox

5 steps to a style update: Schlage interior door hardware installation

By emily.bailey

Wednesday, February 28, 2018

5 steps to a style update: Schlage interior door hardware installation

You might be surprised by how easy it actually is to install new levers or knobs. For most, installation requires no more than 5 minutes.


READ MORE

Door hardware - Installation - Schlage

You’ve probably heard us say it before, and we’ll say it again: a door hardware upgrade is one of the simplest and most affordable ways to add an instant style lift to your home’s interior.


It’s true, those of us at Schlage are total door hardware nerds – we love switching up styles and playing with finishes, so of course we think new hardware is a great idea! But you might be surprised by how easy it actually is to install new levers or knobs. All of our hardware is guaranteed to fit on standard door preps, so for most, it’s a 5-minute job that requires nothing more than a screwdriver.


Take a look below at a step-by-step breakdown of the installation process to see just how easy the steps are.

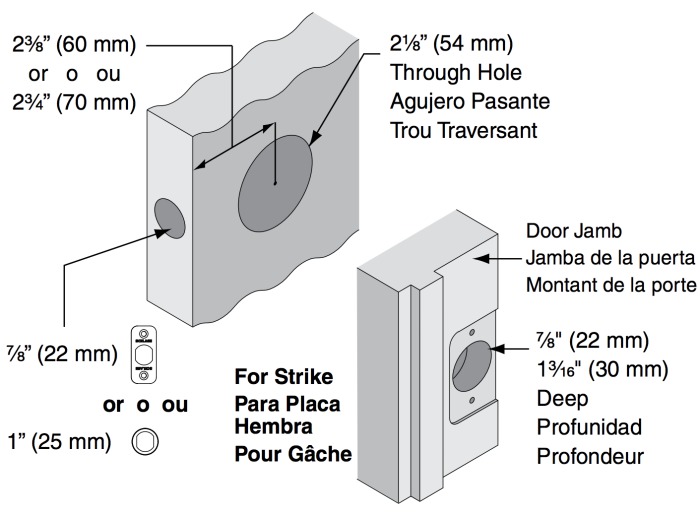
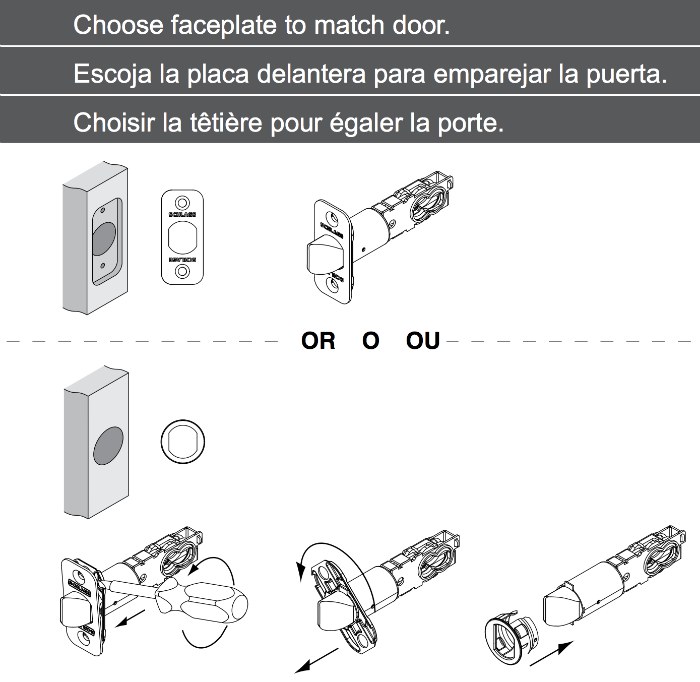
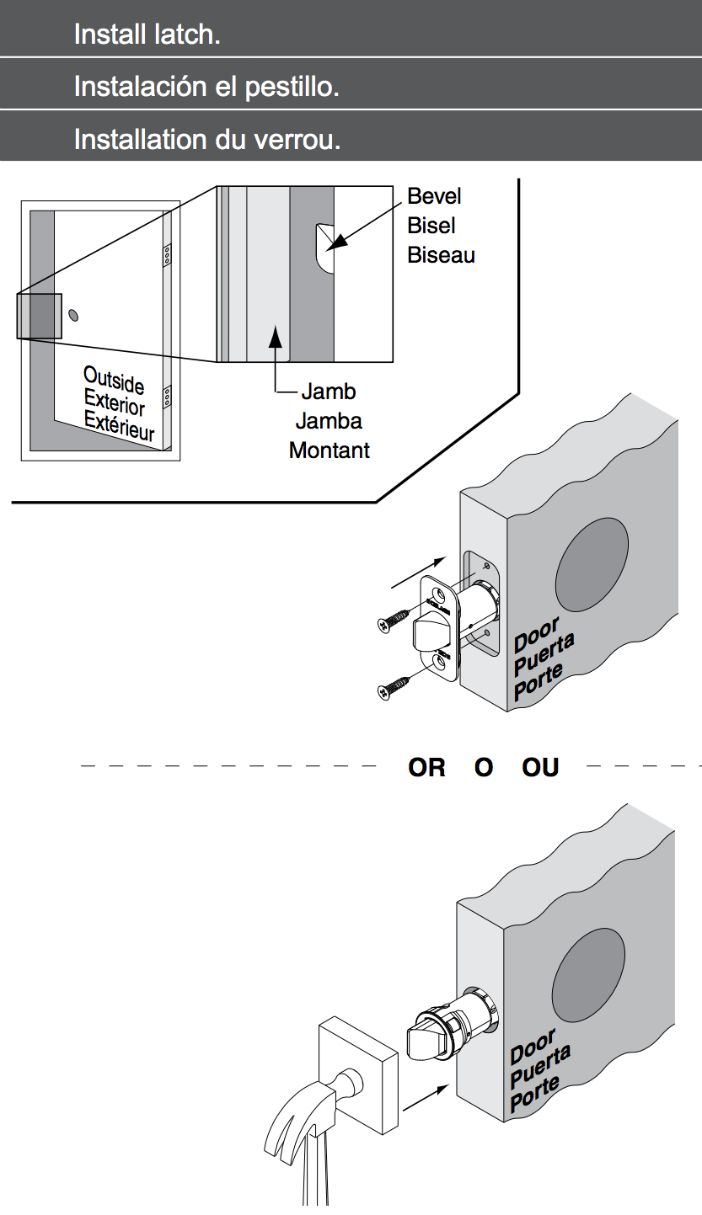
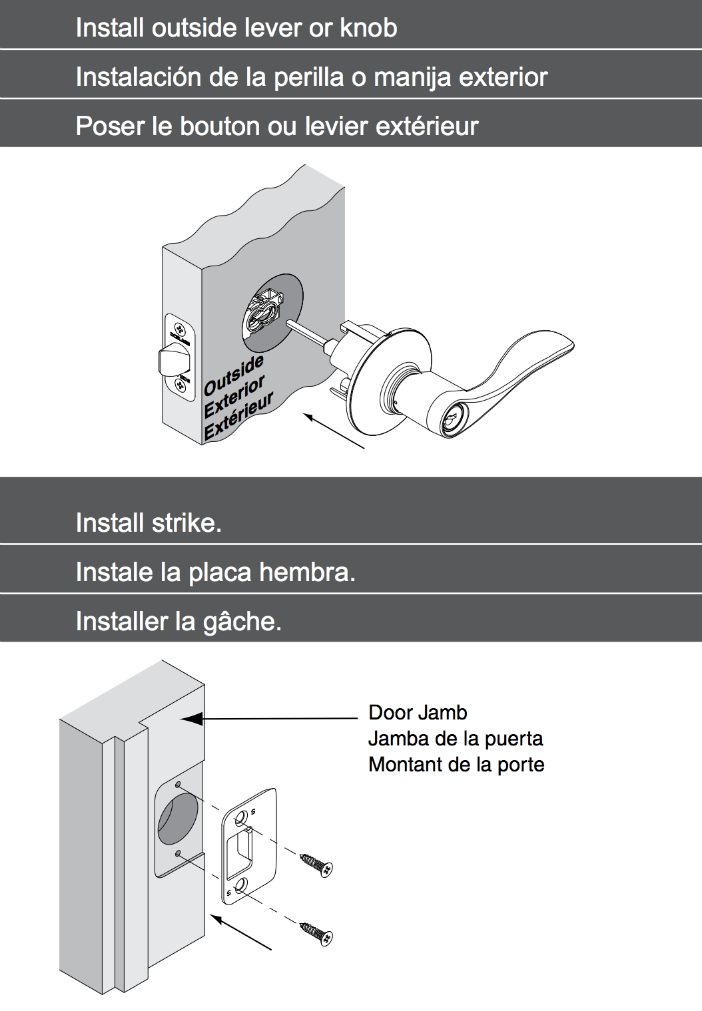
Schlage door lock installation

1 As mentioned above, Schlage door hardware is guaranteed to fit on standard door preps. If you’re unsure whether your door is prepped correctly, double check these measurements:
Door hardware - Installation - Door prep - Schlage
If your measurements are different, you can call customer service at 888-805-9837. You may be able to get a different install kit for your non-standard door.
Most doors won’t require any adjustments to the latch, however, you are given some extra options, just in case. If your door doesn’t have a rectangular cut-out around the latch hole, you’ll want to use the round drive-in faceplate. You can use a flathead screwdriver to pop the rectangular faceplate off, then attach the round drive-in faceplate by sliding it over the top of the bolt and snapping it into place.
Door hardware - Installation - Schlage
3Installing the latch is easy; for the standard rectangular faceplate, simply slide the latch into the hole until the faceplate is flush with the door, and secure it to the door with the two included screws. Make sure the beveled side of the bolt is facing the door jamb. The round drive-in faceplate is even easier: slide the latch into the hole, then cover the bolt with a block of wood to protect it from damage and use a hammer to gently tap it into place.
Door hardware - Installation - Schlage
4Now you’re ready to add your knob or lever. The posts attached to the levers will slide through the latch, then you can secure them in place with the two screws. The final step is to attach the strike plate to the door jamb with the screws provided.
Door hardware - Installation - Schlage
5Once you’ve gotten your new hardware on the door, you may find that your lever looks funny because it’s upside down. Don’t worry, this is easy to fix! Use the small pin included in the box to remove each lever. Switch each lever to the other side of the door so that the curved tip points downward, and snap it back into place.
Door hardware - Installation - Schlage
As you can see, in just a few easy steps you can change the style and finish of your hardware and give any room in your home an aesthetic lift! As always, let us know if you have questions by reaching out on Twitter or Facebook.