Open to color: Tips for painting trims and doors.
Thursday, April 2, 2020

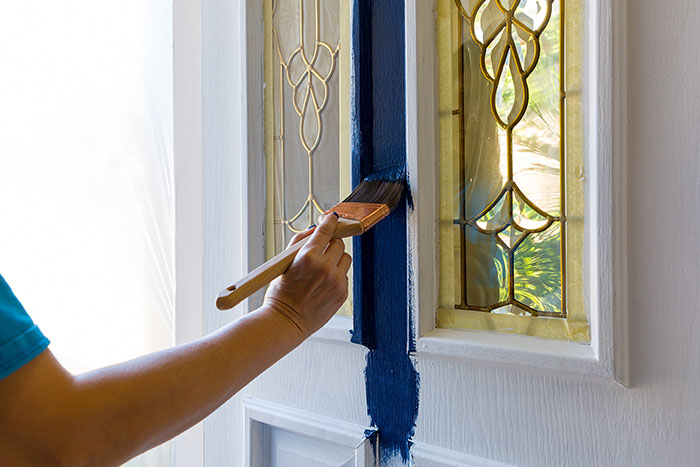
Even people who claim to love painting often blanch when it comes time to paint trims, baseboards and doors. Breathe easy and try our tips and tricks for putting new hues on those finicky architectural details.
Even people who claim to love painting often blanch when it comes time to paint trims, baseboards and doors. Their narrowness and proximity to glass make slopping paint where you don’t want it riskier than when you’re painting an entire wall. Do it wrong and you’ll spend more time cleaning than painting. Breathe easy and try our tips and tricks for putting new hues on those finicky architectural details.
Don’t fear color
- You probably already have a new wall color picked out, so whatever you choose for your trims and doors should complement that. There’s always classic white, but if you have high-quality architectural details, don’t be afraid to show them off. Better Homes & Gardens has some tips for highlighting your home’s woodwork with color.
- Beyond color, think about how some sheen, especially on trims, can impact the look of your room. Choose a paint finish with a higher gloss than your walls to help the trim stand out.
- Many of us forget that doors are a perfect opportunity to play with color. Go for a fun hue to pop against neutral walls. Or even try a black door for an unexpected yet sophisticated feel.
Prepare, then paint
- The devil is in the details when it comes to trims and doors, but the job becomes a lot less evil when you have the right tools. An angled brush, 1 to 2 inches wide, is good for trims. Try a brush that’s flatter and slightly larger – about 3 inches – for doors. And don’t forget a paint pail with a handle to easily carry smaller amounts of paint up a ladder with you, a non-slip drop cloth and, especially if you’re going to be doing a lot of taping, a tape dispenser to make it quicker and easier. Find more must-have painting tools from Pretty Handy Girl.
- Paint and primer can only go so far to cover up flaws. Fix cracks, spackle over nail holes and tackle other repairs before diving into the cosmetic projects. You’ll be disappointed when you can still see the problems, even after your painting efforts.
- When painting doors, clean the hinges and hardware, too. If there’s paint from past jobs, now’s your chance to either remove the old color or replace the hardware for a completely updated look.
- It seems like a lot of extra work, but you’ll be glad you took the door off the hinges to paint it. Our favorite pre-painting trick is Family Handyman’s “wet the floor.” Especially after sanding the door to remove old paint and make your repairs, there will be dust in the air. Wetting the floor will keep that dust from puffing up on your new paint job as well as raise the humidity in the room to help keep the paint wet longer and reduce streaks and lap marks as you work.
First things first
- Do you paint the walls first or the trim? It seems no one can agree, but we suggest trim first, followed by ceilings , then walls. When you paint the trim first, simply tape off or cover the floor, and if you splash on the walls, there’s nothing to worry about. You’ll simply paint over it later with your wall color.
- With doors, paint all four edges – yes, even the bottom that runs along the floor – first. If you have molding or detail work along the door faces, do that second, using a brush. Make your final step painting the larger flat areas with a roller.
- Repetition is your friend. Clean (the door and/or trim). Sand. Clean again (your work area so dust doesn’t ruin your paint job). Paint. Sand again (to remove dust nubs between coats). Paint again. Then be patient. If you painted the trim, wait until it is completely dry before applying tape to start painting the walls. If you painted the door, try to wait until it’s completely dry before rehanging it.
Accessorize
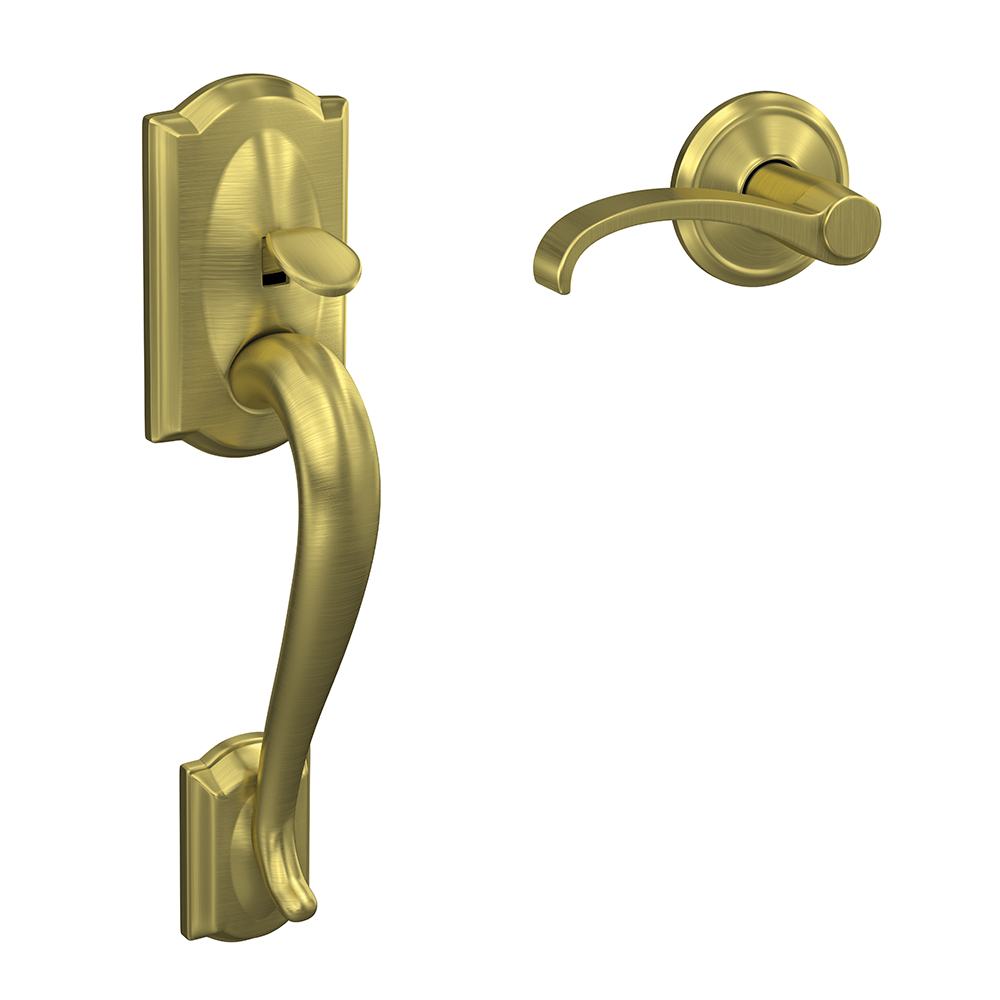
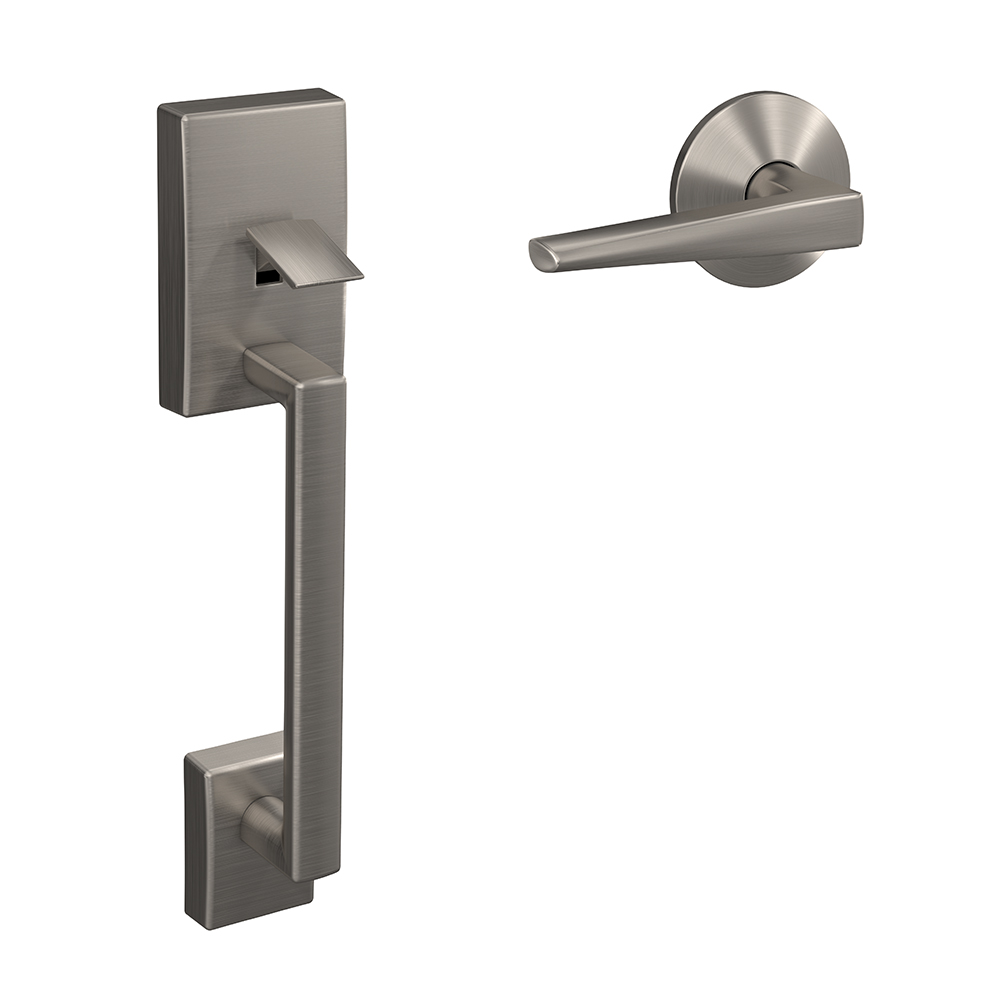
- If you take the time to paint your home’s trim, baseboards and doors, making a statement with the details obviously matters to you. Pay attention to your door hardware, too. With a new door color, you may want to choose a finish for your hardware that completes the look. Schlage offers a variety of finishes, from gleaming Bright Chrome to classic and versatile Matte Black.
- Small rooms can be hard to accessorize because of their small footprint. Use your door to spice up your look and not just with paint. If you have a dull hollow core door that needs a refresh, try one of these makeovers.
Looking for motivation or inspiration? Find us on Pinterest to get your creative juices flowing and see all the ways Schlage can help transform your home.