Color all around: Tips for painting floors and ceilings.
Tuesday, April 21, 2020

Updating the look of a room by painting above and below does provide a unique set of challenges, but these tips and tricks can help you successfully paint your ceilings or floors.
Of all the surfaces to paint in a room, floors and ceilings are probably the most overlooked. Maybe you lack inspiration or maybe you’re overwhelmed by how to tackle these DIY projects. Updating the look of a room by painting above and below does provide a unique set of challenges, but these tips and tricks can help you successfully paint your ceilings or floors.
Consider color and type
- Most ceilings are painted white to make a space feel larger, but there’s no rule that says you have to go colorless. Treat it like an accent wall or go two-tone, like this pink-on-pink option. Sheen is important with ceilings, too. Most ceiling paints offer a flat finish because it hides imperfections, but high-gloss and eggshell options will reflect more light down into the room.
- The possibilities are open when it comes to painting your floor. We especially love “faux” treatments like painted-on runners. Create a checkerboard pattern fit for a (chess) queen without laying tile. Or take the lead from Dans le Lakehouse and create a marbled look with watercolors.
- The “right” paint when it comes to floors and ceilings is equal parts color and type. Once you’ve picked the look, the right kind of paint will help you maintain it. For ceilings, The Spruce recommends one with higher viscosity so it doesn’t drip on your head as much (see our note below if you have a textured ceiling, though). True ceiling paints also tend to be better at covering stains, important since that’s where water and cooking spots, mildew and cigarette smoke tend to collect.
- For floors, the type of paint depends on what material you’re working with. For timber flooring, porch paint works great for a rustic look, while a water-based acrylic urethane will give a more polished look, says Decorated Life. Liming floorboards can bring out the grain in natural woods, and milk paints can help create a checkerboard look. Concrete floors lend themselves to painting, staining and even etching for a unique look. Regardless of your type of flooring, you’ll probably want to seal it at the end to preserve your handywork.
Prepare for success
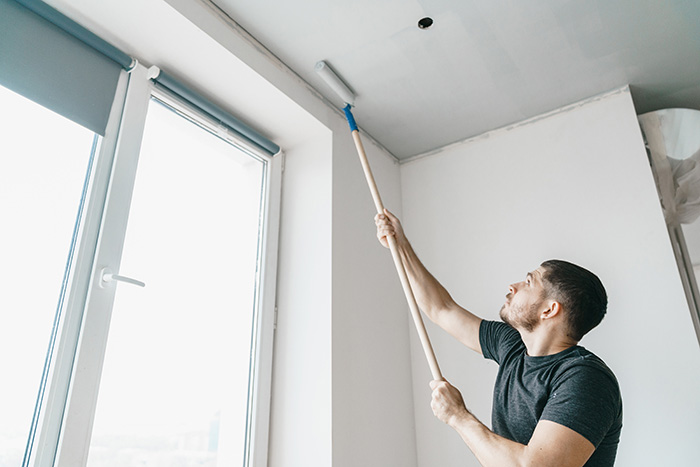
- The right tools make all the difference. You’ll be glad you picked a light-weight pole extender for painting ceilings. It doesn’t have to be fancy, but it should be easy on the arms. A high-quality brush is also a must to cut in cleanly along the edges and in corners. While you’re at it, invest in a stain-blocking primer for your ceiling as well.
- Sanding is a dirty job, but you’ll be glad you did it if you want paint to bond well to the floor. Just be sure you clean really well before laying down your first coat. You don’t want dust mucking up your new-looking floors.
- When you paint walls, you don’t always have to remove all the furniture. Sometimes moving it to the center of the room will suffice. But when you’re painting a ceiling or the floor, everything has to go. Don’t forget to remove the light fixtures, either. It’s tempting to just paint around the medallion, but if you ever switch it out, you’ll probably be left with a weird combo of old and new paint. It’s also easier to paint without it in the way since you don’t have to cut in.
- Painting ceilings and floors have their own unique safety concerns. You probably need a respirator since some of these special paints come with serious fumes. When it comes to ceilings in particular, get yourself a ballcap and some goggles to protect your head and face from splatter. While not technically safety-related, you can make cleaning splatter off your body easier by applying lotion to arms and hands, according to Family Handyman.
Keep your head up
- When should you paint your ceiling – before or after the walls? We recommend painting ceilings before walls (and definitely before the floor) but after the trim. That way, when you slop paint on the walls or drip on the floor, you’ll be able to simply paint over the mishaps later.
- Textured and popcorn ceilings are a bit of a different ballgame. First, that high-viscosity latex paint we mentioned before will need to be thinned. Thicker paint will weigh on the texture and cause it to peel. Other tricks include rolling in only one direction – no W’s and no back-and-forth – and choosing a roller made for textured surfaces so you get the paint in all the nooks and crannies.
- Have a really big space? Don’t shy away from spraying the ceiling. It will probably cost more money, but it might be worth not having cricks in your neck and shoulders.
- Some people swear by the “W” technique when painting a room. While that’s perfectly acceptable for walls, not so with ceilings. Work in grids when working overhead.
- Here’s an often-overlooked hack for painting ceilings (or anything, really). Use a drop cloth that’s a different color from your paint. You’ll be able to see drips and spills more easily. And make it a non-slip drop cloth while you’re at it.
- What do toddlers and rollers have in common? Nap length matters. When painting ceilings, you want a longer nap than what you use on walls because it affects texture. Brad the Painter suggests at least 3/4 inch.
Build a beautiful foundation
- Patience is the name of the game when painting your floor. Think lots of thin coats to get good coverage that will last. And especially if you’re doing decorative work – painting designs or staining to create a certain pattern – you may have to wait for your previous coats to dry completely before tackling the next step. As much as you want to finish the job yesterday, give it time. You won’t regret it.
- Stenciling your floors is a great way to add a design if you have no artistic talent. Young House Love, who has taken on several stenciling projects for both walls and floors, offers some handy tips. Use a roller instead of dabbing to apply the paint, but be careful not to overload the roller to avoid smudges getting under the stencil. Also, as you get closer to the wall and want to keep the stencil from accidentally transferring paint where it shouldn’t be, simply use cereal boxes or other cardboard to create a convenient, low-cost barrier.
It’s easy to overlook the floors and ceilings when you’re thinking about painting. If you like the idea but are in need of inspiration, check out Schlage on Instagram and Pinterest.