How to install a Schlage Custom™ Combined Interior lock
Wednesday, March 21, 2018

Here are all the steps you need to follow to properly install your new hardware in just a few minutes.
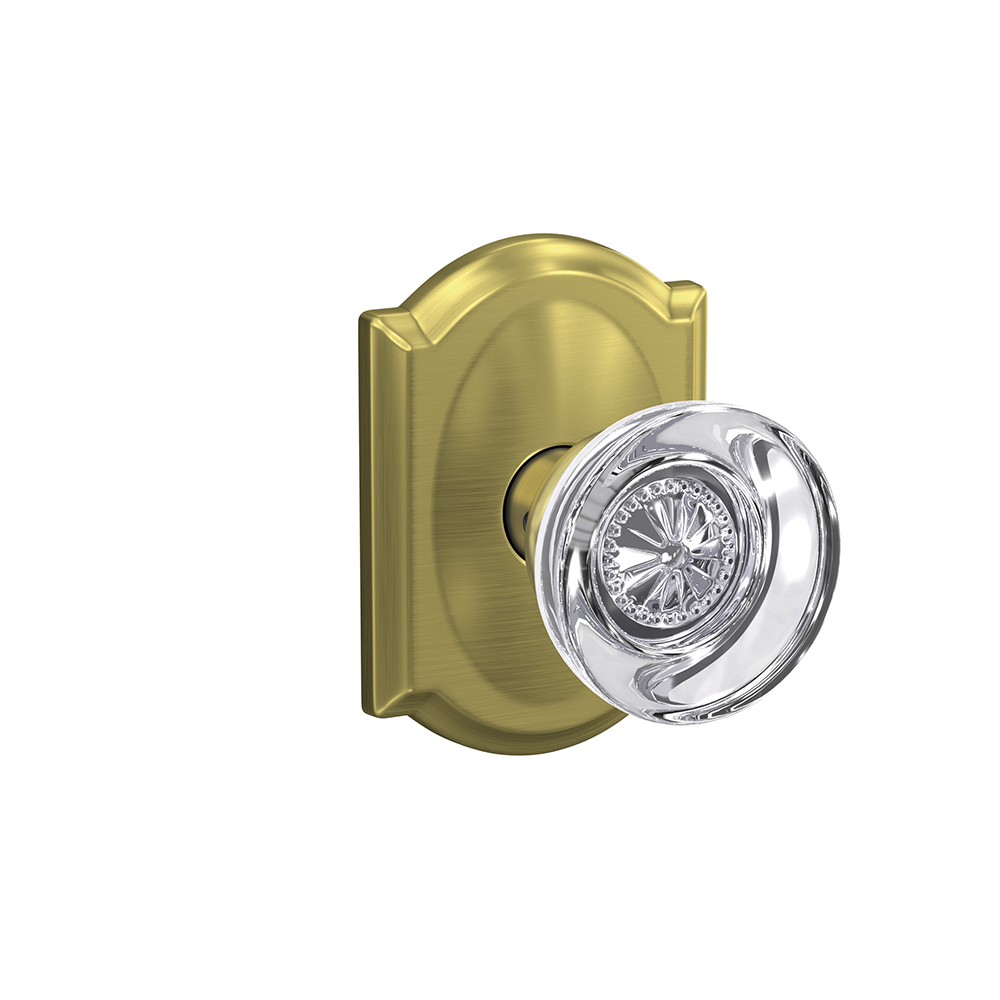
With a wide range of architecurally-inspired styles featuring a premium designer look and feel with concealed screws and low profile trim, Schlage Custom Door Hardware is out top-of-the-line offering that allows you to create the perfect customized look to elevate your home's style.
Schlage Custom combined interior door hardware offers both hall/closet and bed/bath functionality in one lock. From nursery to bedroom to home office, you can adapt to the ever-changing life of a room by switching from one function to another. Simply insert the locking pin on the interior side of the lock to enable locking for bedrooms and bathrooms.
Installation is easy and Schlage Custom hardware is guaranteed to fit on standard doors. You'll only need two tools to complete the job - a tape measure and a screwdriver. Before we get started, be sure your door is properly drilled and aligned with this door prep checklist.
Door hardware parts checklist
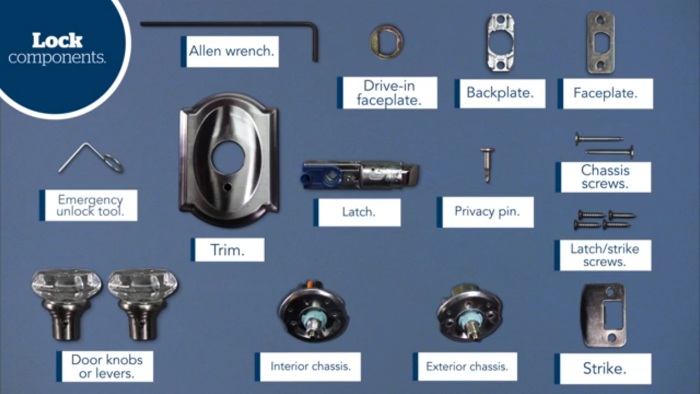
 Allen wrench: You will use this to tighten the knob or lever.
Latch: A spring operated bolt with a beveled face to permit a latching action when the door closes.
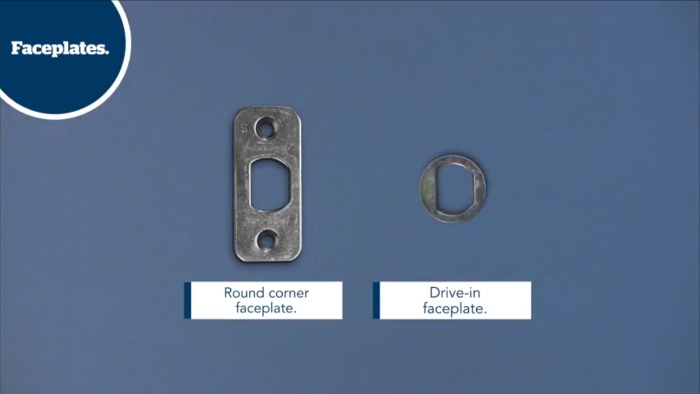
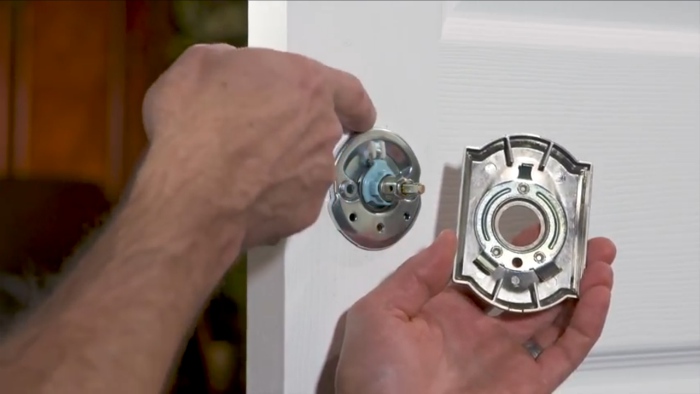
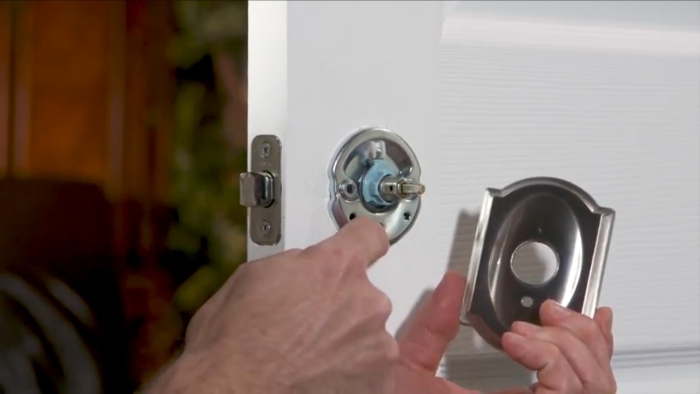
Round corner faceplate: This is the decorative faceplate attached to the latch.
Backplate: The backplate is used to secure the round corner faceplate to the latch.
Drive-in faceplate: This is an optional faceplate that may replace the round corner faceplate if your door calls for it.
Strike: The strike plate is the metal plate that will be affixed to the door frame. The strike is used to increase security by holding the latch in place.
Latch/strike screws: These will be used to secure the latch and strike with the door.
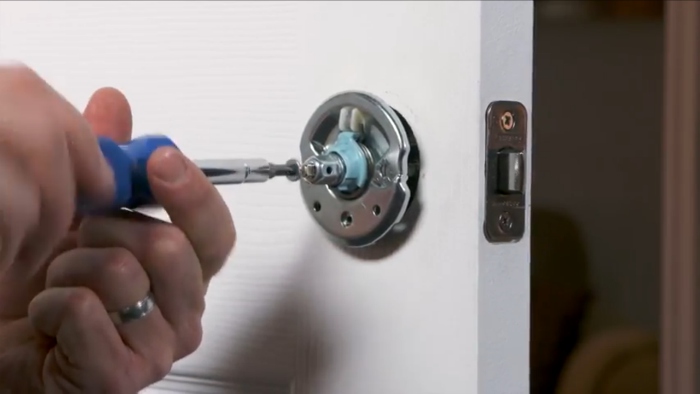
Chassis screws: These will be used to secure the interior chassis to the exterior chassis.
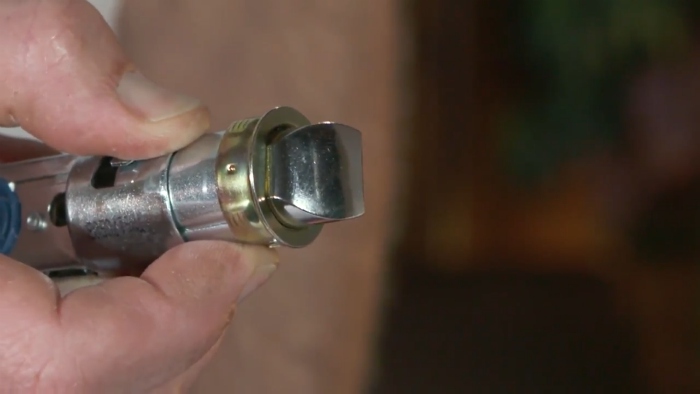
Interior chassis: This chassis will be installed on the interior side of the door and will be secured in to place with the chassis screws.
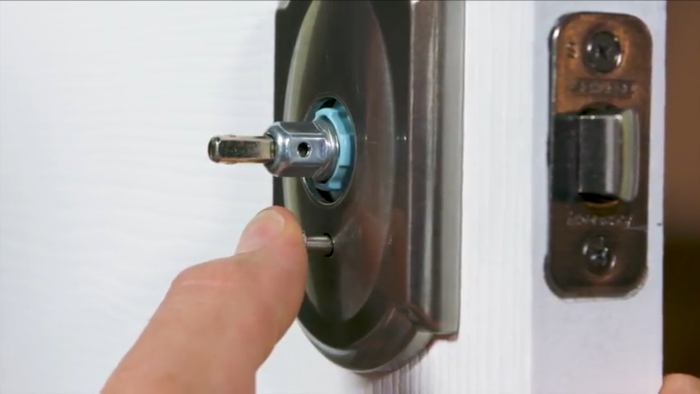
Exterior chassis: The chassis with two posts and a privacy pin hole.
Trim: A circular or decorative trim plate attached to the door under the knob or lever.
Door knobs or levers
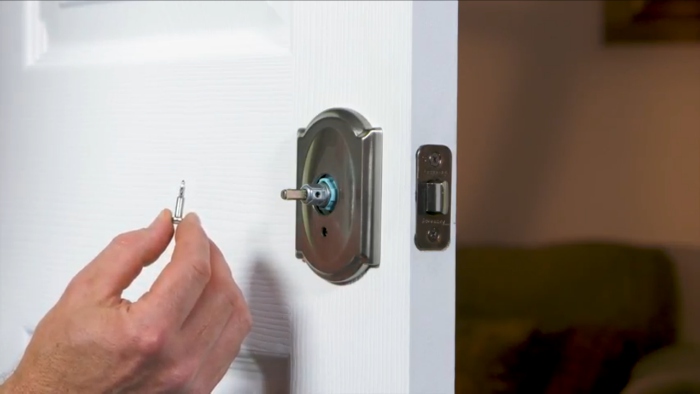
Privacy pin: You will need this tool to change the function of your lock from locking to non-locking.
Allen wrench: You will use this to tighten the knob or lever.
Latch: A spring operated bolt with a beveled face to permit a latching action when the door closes.
Round corner faceplate: This is the decorative faceplate attached to the latch.
Backplate: The backplate is used to secure the round corner faceplate to the latch.
Drive-in faceplate: This is an optional faceplate that may replace the round corner faceplate if your door calls for it.
Strike: The strike plate is the metal plate that will be affixed to the door frame. The strike is used to increase security by holding the latch in place.
Latch/strike screws: These will be used to secure the latch and strike with the door.
Chassis screws: These will be used to secure the interior chassis to the exterior chassis.
Interior chassis: This chassis will be installed on the interior side of the door and will be secured in to place with the chassis screws.
Exterior chassis: The chassis with two posts and a privacy pin hole.
Trim: A circular or decorative trim plate attached to the door under the knob or lever.
Door knobs or levers
Privacy pin: You will need this tool to change the function of your lock from locking to non-locking.
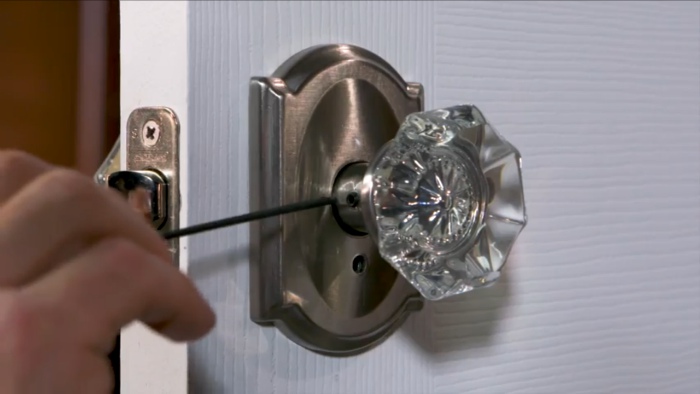
Emergency unlock tool: This tool can be used if your lock is set to privacy and is ever accidentally locked. Be sure to keep this tool some place handy.
Installation instructions
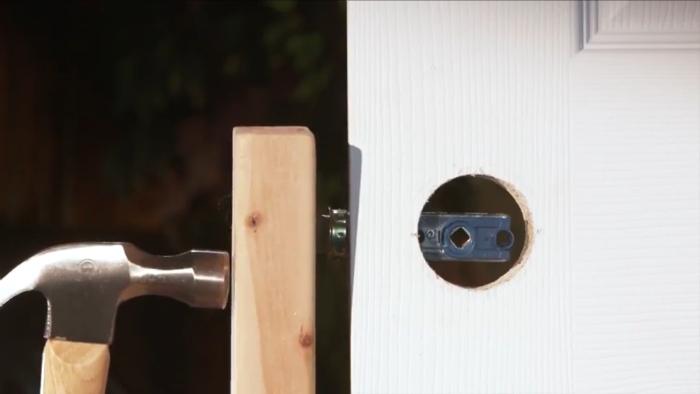
1You'll begin by first installing the strike. Secure the strike to the door frame using the two short screws.

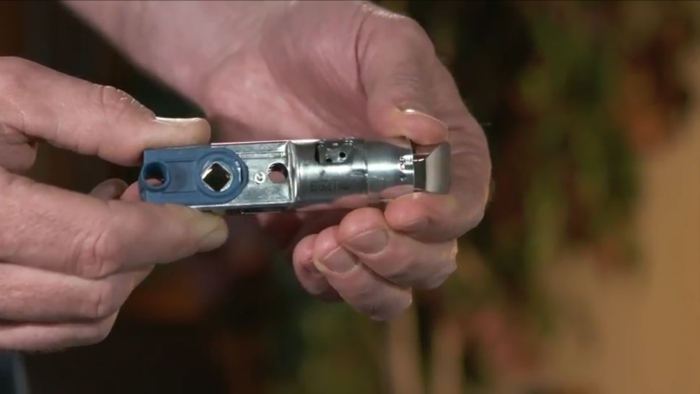
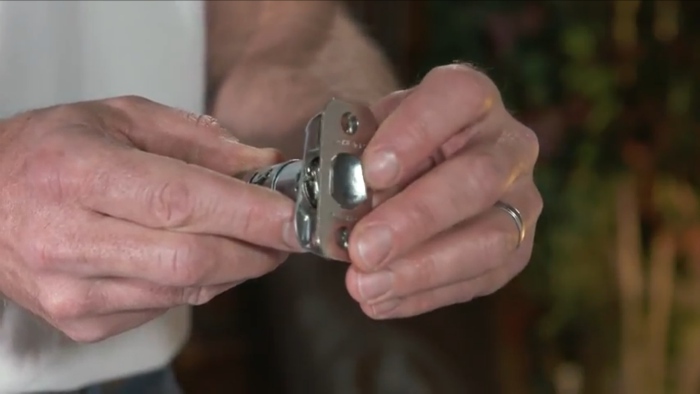
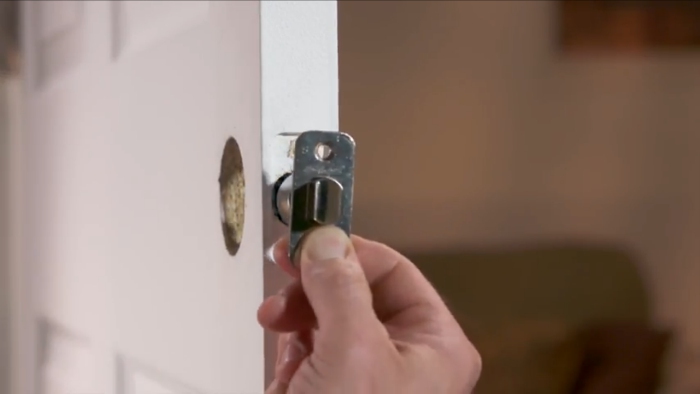
4If you're using the round corner faceplate, be sure that the angled beveled side is facing the door frame and slide the latch into place and secure with the two remaining short screws.
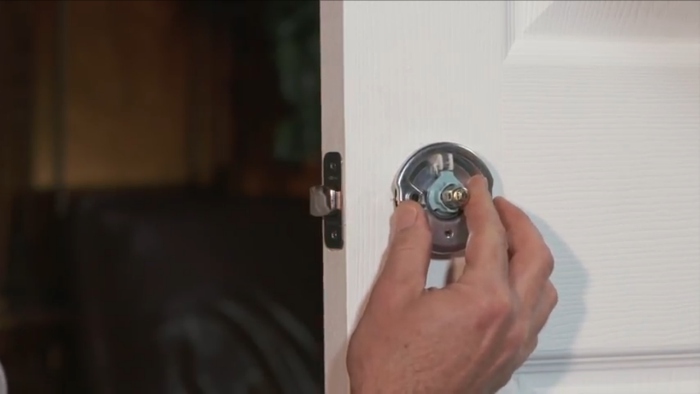
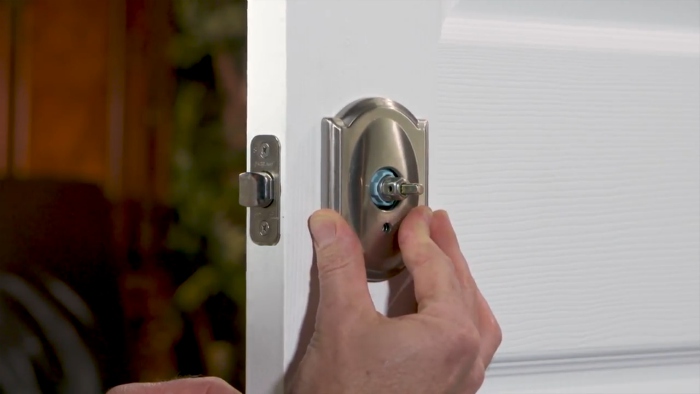
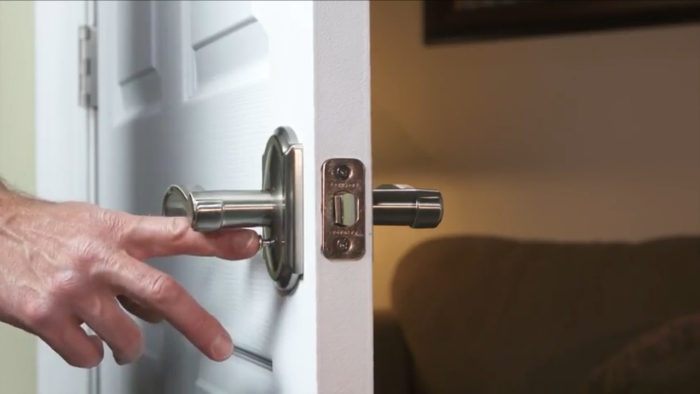
6Place the interior chassis on the other side of the door and secure with the long chassis screws, being careful not to overtighten them.
Testing the lock
2To disengage the lock, simply turn the lever on the interior side to unlock.