Categories

Blog

Your browser is out of date

This website will not look or function as originally intended in your current browser

We recommend upgrading to the latest version of Internet Explorer or Chrome or Firefox

    How to mix hardware finishes the right way.

    June 08, 2022 by emily.bailey

    Wednesday, June 8, 2022

    mixed finishes | Schlage

    Mixing metals and finishes can create visual interest that is both refined and intriguing. Here's how to get the look right.


    READ MORE

    Mixing metal finishes can add dimension and visual interest to a room. Instead of a monochromatic, one-note space, you create intrigue and the illusion of texture with small touches. A mix of finishes can blend styles and make a room more reflective of your personal taste.


    So how do you get creative without making your home feel like a fun house? Follow these four simple steps.

    Farmhouse kitchen with mixed hardware finishes.

    1. Find inspiration in something that already exists

    Maybe you have a polished nickel faucet you love, or you’re tired of seeing brass all over the house. Maybe there’s a statement piece in your décor that needs a complementary finish. Find or imagine one metal finish in your home which you absolutely can or cannot live without. Whatever it is, consider either replacing or accentuating it.


    Sometimes this means shifting your style around appliances you cannot replace. Even if that is the case and you don’t love what you’re starting with, it helps to have a guide when choosing new hardware to transform your space.

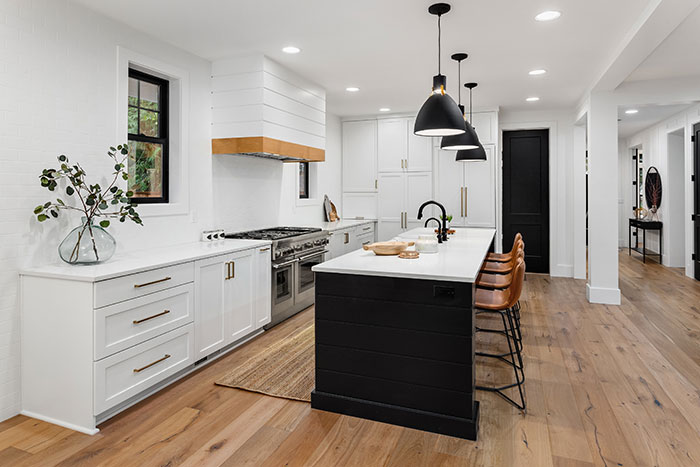
    2. Mix and match finishes

    The most important thing to remember when mixing finishes is not to go overboard. Avoid creating more chaos than style and keep your designs between two to four finishes, starting with a matching element.


    Notice how the chrome faucets pair nicely with the gray countertops and flooring in this bathroom image on Houzz. They set the foundation for contrasting gold elements.

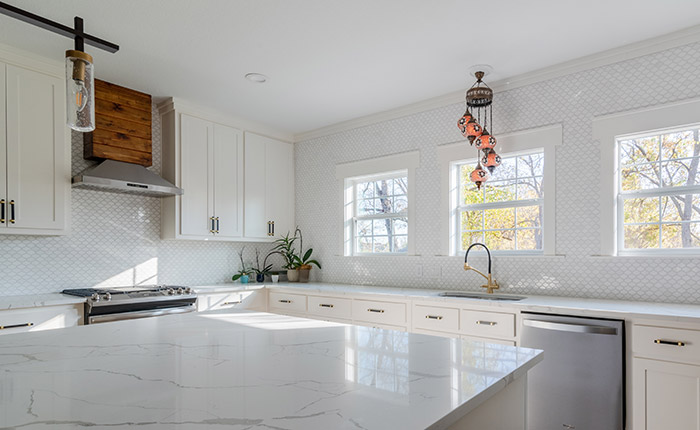
    3. Choose a complementing contrast

    Once you have a foundation like a color palette or theme to work with, choose a contrasting finish that complements the others. The best rule of thumb is to consider an opposite finish—for matte or brass tones, look to chrome or other bright metals. Below are a few suggested finish pairings and links to beautiful examples online.
    Black & Gold hardware + Stainless Steel Appliances
    White kitchen with black and gold finishes and hardware.
    Matte Black Hardware and Bedding + Brass Lighting from I Spy DIY
     
    Oil Rubbed Bronze Cabinet Pulls + Antique Brass Lighting + Satin Nickel Faucet from Columbia Interior Designers & Decorators Pulliam Morris Interiors
    Matte Black Door Hardware, Lighting & Faucet + Gold Mirror & Cabinet Pulls from Jenna Sue Design
     
    Copper Pendants + Nickel Cabinet Pulls from Toronto Interior Designers & Decorators Sealy Design Inc.

    4. Pull it all together

    Once you've created just the right amount of balance and visual interest, it's time to put the finishing touch on the room. If you're trying to add a little glitz and glam to a traditional space, Lucite accessories and sparkling chandeliers are the perfect way to tie it all together. If your room already sparkles enough, consider a linen shade or softer accessories to tone it down.


    An antique brass chandelier and mirror provide just the right amount of warmth to this cold bathroom on Houzz while polished nickel plumbing gives it just the right amount of modern flair.

    Oil rubbed bronze and antique brass cabinet pulls are brought to life by the reflective canisters on the counter in this calming kitchen.
    And don’t forget that some metallics aren’t metal at all. Fabrics with a metallic sheen can combine balance and contrast in an unexpected way. The silver of the pillows contrast beautifully in this bedroom with the gold light fixture and other sheen in the wall décor.

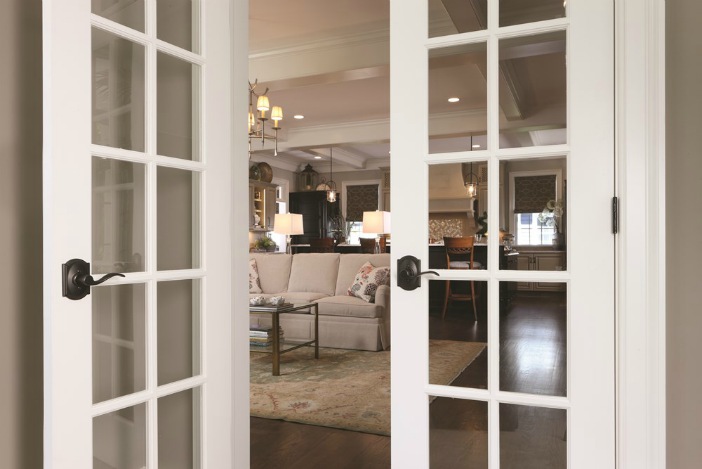
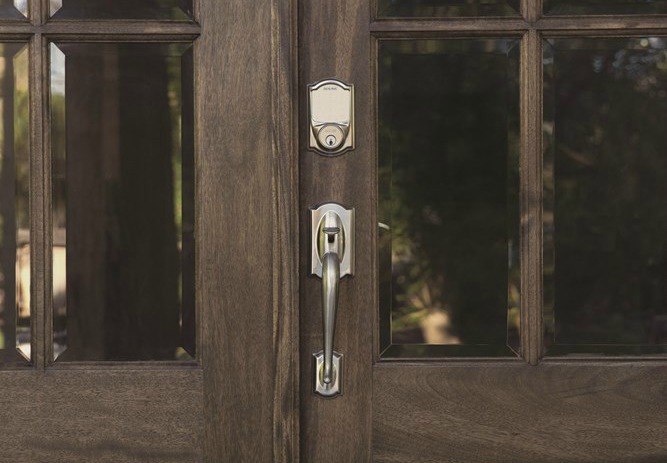
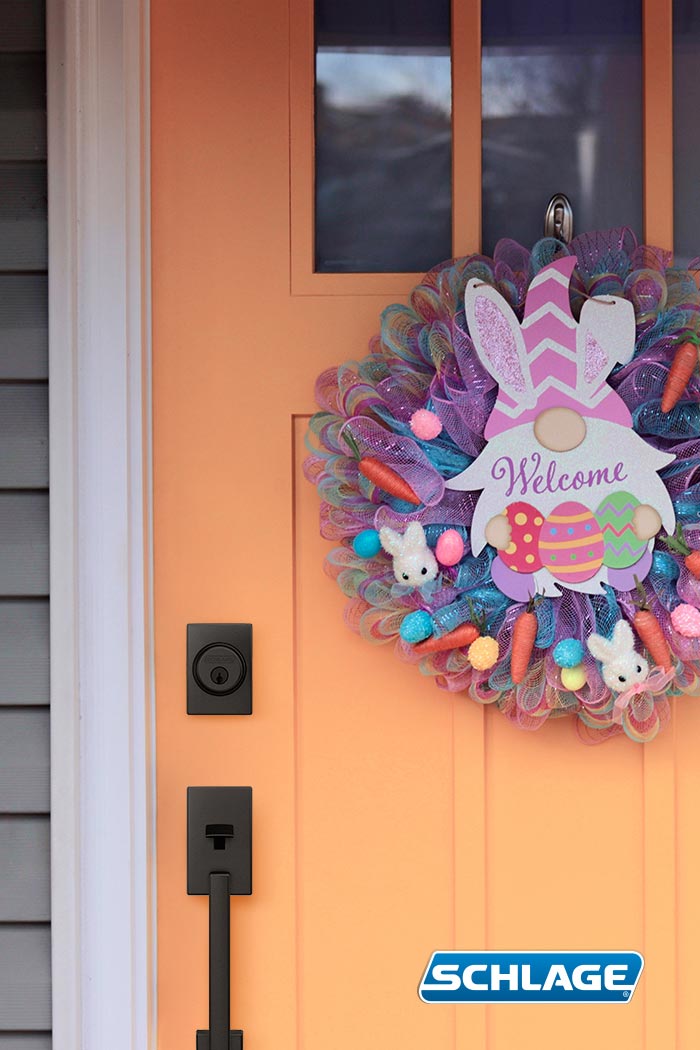
    Mixing hardware finishes is one way to make a statement. Schlage has crafted a range of designs and finishes that can help you show off your style in the details of your home.


    Not sure what your look is yet? Try our interactive Style Selector or join us on Pinterest for plenty of inspiration.


    How to choose door locks for French doors.

    June 03, 2022 by emily.bailey

    Friday, June 3, 2022

    Locks for French Doors

    How do you purchase the right door hardware for French doors? Here’s what you need to know before you head out to the hardware store.


    READ MORE

    French doors offer a great way to create an open, bright space in your home while still maintaining the option for privacy. They often feature glass from top to bottom and are an easy way to add a little charm and character. But how do you purchase the right door hardware for French doors? Here’s what you need to know before you head out to the hardware store.


    French Doors - Door locks - Schlage

    Before choosing french door locks

    Take a moment to get familiar with the style and features of each double door. See how it is prepped. Are bore holes already drilled into the door or is there a solid panel where the hardware will be? Knowing this will help you choose the function of your hardware. For doors that do have bore holes, check out this door prep checklist to ensure your door has been prepped to standard measurements.


    If you are planning to purchase a lever with a curve, you’ll want to note the handing of your doors. Since you will have both a left and right handed door, be sure to choose both a left handed lever and a right handed lever. A little bit of homework will help you get a French door locking system that makes your home safer and more stylish.


    When purchasing door hardware online, confirm how many knobs or levers are included. Non-turning door hardware is often packaged as a single lever or knob, but our collection of non-turning Schlage Custom™ Door Hardware is sold in pairs. This leaves no need to worry about handing for curved levers because the left and right versions are packaged together for you.

    Door locks for interior French doors

    Home offices and dens that branch off from a larger living space are a perfect fit for French doors. Double doors allow you to add privacy or noise control while still maintaining an open feeling.. It’s also common to see interior French doors for a bedroom entrance – giving it a grander, formal feel – or even for large closets.

    No bore holes

    Full glass french doors leading from kitchen to attached sun room with Schlage Accent levers.


    For double doors without pre-drilled bore holes, you will need non-turning or dummy function door handles. These are often used as decorative door pulls when the ability to latch or lock a door is not needed. For shallow closets, feel free to install door hardware only on the exterior side of the door. For larger rooms you can actually walk into, make sure to purchase enough non-turning door knobs or levers for the interior side.

    French Doors - Non-turning Door Hardware - Schlage

    One bore hole

    Glass paned french doors leading to bedroom with lockable Schlage Georgian knobs.


    There are rooms that should lock or at least have a door that latches. For these, install double doors that come drilled with a cross bore hole on one side and a latch bore on the other.


    Let’s say the cross bore hole is on your right-handed door. If you want the option to lock it, choose a Bed & Bath / Privacy function for your knob or lever. If you’d like the door to latch and not lock, choose a Hall & Closet / Passage function. Purchase matching, non-locking / dummy hardware for the left-handed door.

    French Doors - Passage and Privacy Door Hardware - Schlage

    Door locks for exterior French doors

    Exterior French doors are most used to access outdoor living spaces like a sunroom, patio or deck. They offer a stylish way to make a seamless transition from one space to another. Double doors for the front of your home makes for an elegant entryway.


    Glass french doors leading from home office to outdoor patio.

    Two bore holes

    Sets of double doors leading outside should have one door prepped with a bore hole and none in the opposite door. For added security, confirm there is a second bore hole to house a deadbolt. If the door is not properly pre-drilled, purchase a cross bore kit to easily drill and install the hardware yourself.


    A single cylinder mechanical deadbolt will do, but some homeowners prefer to install a double cylinder deadbolt for even more security with glass doors. As smart homes become more popular, homeowners are also turning to smart locks on French doors. Beneath your preferred deadbolt, you may choose a keyed knob or lever.

    Exterior double doors - Deadbolt - Schlage

    Exterior double doors with Schlage Addison Handlesets

    Three bore holes

    For a more formal entrance or when a door has three bore holes, choose a handleset. For the inactive side of the door., you may install nothing, or add the non-turning/dummy version of your active hardware. (In other words, if you purchase a Schlage Century entry handleset with deadbolt for one side, you may also get a Century inactive handleset for the other.

    Exterior double doors - Handleset - Schlage

    Can you put a smart lock on French doors?

    Exterior French door with Schlage Sense smart lock and Schlage Camelot front entry handle.

    All Schlage electronic and smart locks are compatible with standard doors so you can install them on your French or double entry doors the same as you would a mechanical deadbolt. The double entry door above features a Schlage Sense® Smart Deadbolt paired with the Camelot style front entry handle.


    If you only have two bore holes, you can add a passage knob or lever below your smart or electronic lock. And of course, there’s still the option to add a non-turning knob or lever to the inactive side of your entrance.

    Exterior double doors - Electronic lock - Schlage

    We’d love to help you in your search for the perfect French door hardware. Try our interactive Product Selector tool to start browsing the right hardware now. And if you’re looking for more French door design ideas, check out this inspiring guide to styling your French doors.


    Inexpensive outdoor DIY projects to tackle this weekend.

    May 09, 2022 by emily.bailey

    Monday, May 9, 2022

    diy outdoor projects | Schlage

    You don’t have to make a major investment to make a big impact when you’re looking to upgrade your home.


    READ MORE

    You loved our list of inexpensive interior DIY projects. Now here are some budget-friendly home improvement projects to tackle outdoors. This is proof that you don’t have to make a major investment to make a big impact when you’re looking to upgrade your home.
    Bohemian backyard patio.

    Pretty up your porch

    A good alternative to building a fence is adding a privacy wall to your porch or deck. Done right, it can block sightlines and dampen noise from the neighbors, provide shade and add some visual interest. In addition to wooden slats like this beautiful and affordable DIY by Crafted by the Hunts, consider less expensive options like outdoor curtains or lattice with or without climbing plants. Check out these other outdoor privacy screen ideas.

    More inexpensive DIY projects to update a front porch:

    • Add porch lighting, whether it’s sconces on the side of the house, a lamppost near the steps or string lights at the roofline. Extra light not only makes your porch and home more secure, but it’s also more inviting to you and your guests.

    • Replacing the flooring of your porch or patio can be a major investment in both time and money. As long as it’s structurally sound, try painting the flooring to create a new look instead. We couldn’t be more impressed by this before-and-after painted concrete porch upgrade by Thistlewood Farms. They didn’t even have to paint the entire thing to turn an eyesore into a welcoming stoop.

    • Don’t forget to look for functional porch décor. A stylish side table that doubles as storage for your patio furniture cushions in the offseason? Yes, please. Even a front door handleset can give your entryway a style boost while also helping to protect your home.

    Get your hands dirty

    When you hear “container garden,” your mind probably jumps straight to potted plants flanking your front door or lining your patio steps. This season, try window boxes (here are 5 easy tips and tricks to get started from Lily Pad Cottage). Add a splash of color to your home’s exterior with vibrant flowers. Or in the fall, try bright vegetables and gourds. Window boxes are the perfect small-porch décor solution when you don’t have room for large pots or even to hang from the railing of a larger porch.

    More inexpensive DIY projects to improve your landscaping:

    • If your garden is looking unfinished, try adding mulch or other ground cover. It’s the extra detail that takes your curb appeal to the next level. Plus, mulch helps your soil to retain moisture, which can mean healthier plants, especially during a drought.

    • Traditional pots from the garden store are always good, but consider putting your own touch on those containers by painting or adding other embellishments like House by Hoff did with rope. This is also a good way to upcycle other household items like chipped tea cups and kettles, soup cans and rubber boots.

    • When you put a lot of time into your landscaping, you want people to be able to enjoy its beauty. Repair or add a walkway through your garden. You could use store-bought pavers, gravel, stones or even recycled brick.

    Spruce up your curb appeal

    When the Remodeling Cost vs. Value Report is released each year detailing the projects that retain the most value at resale, garage door replacement is regularly number one. In fact, it was the top-ranked project three of the last four years. According to the Remodeling 2022 Cost vs. Value Report, 93.3% of the cost of a new garage door was recouped at resale.


    If you aren’t up for replacing the entire garage door, you still have plenty of options for getting a new look. The obvious route is to simply stain or paint the garage door. We do love these faux carriage doors from Silouette School, though, who took her door from outdated to classic for less than $100.

    More inexpensive DIY projects to boost your curb appeal:

    • Replace your mailbox or give it a facelift. Try coordinating it with other fixtures like lighting and door hardware, especially if you have a wall-mounted mailbox on your porch. Take a look at the matching matte black finishes on I SPY DIY’s porch. If you have a curbside mailbox, spruce it up with some landscaping around the post or a new coat of paint.

    • Some eyesores, like the air conditioning unit or a utility box, can’t be removed. That doesn’t mean you can’t hide them, though. Large fake rocks, fences and ornamental grasses can all safely obscure anything that’s dampening your curb appeal, not to mention add a bit of appeal of their own.

    Take the (DIY) party out back

    We picked a fire pit as our favorite outdoor DIY project to do on a budget because you can use it year-round and for any kind of backyard party. Cozy up to it on a cool fall night or make s’mores over the open flame during the summer (or any time of year because they’re delicious, let’s be honest). Home improvement stores often carry kits to assemble your own fire pit. You can also follow this howchoo tutorial to make your own.

    More inexpensive DIY projects to upgrade your backyard:

    • A water feature is a must-have for your peaceful garden nook. When it comes to installing one, you’re only limited by your imagination. Go for a dramatic water wall on your deck or something more modest like Tatertots and Jello did with a ceramic pot

    • Admittedly, power washing your back deck isn’t the most glamorous DIY project, but you won’t regret it. Renting a power washer for a day or weekend is inexpensive, especially when you consider it can make your deck look like new. Keeping your deck clean can also help extend its lifespan and get rid of potentially hazardous mold and slick green slime.

    There’s more where this came from at the Schlage blog. Start with these 8 easy tips to upgrade your outdoor space or find us on Pinterest.


    How to stay cool and hydrated when you DIY.

    May 03, 2022 by emily.bailey

    Tuesday, May 3, 2022

    Hydrated diy | Schlage

    With summer just around the corner, keep these tips in mind and take care of yourself while completing your DIY projects.


    READ MORE

    The right safety gear for home improvement projects is always a must. What you need often depends on the task, but there’s one simple item that everyone should have in their arsenal no matter what: a water bottle.
    Person filling water bottle at sink with fruit on the counter.

    Why you should stay hydrated during DIY

    Drinking enough water each day has many health benefits. When it comes to DIY home improvement, think of staying hydrated like an athlete. Most projects are physical. Building a deck, gardening, repairing kitchen cabinets, laying new flooring, painting – they all require you to be moving around, on your feet, reaching for and lifting things.


    Staying hydrated helps to prevent muscle cramps. If you’ve ever painting a ceiling, you know those are always lurking around the corner anyway. Drinking enough water can also prevent headaches, increase your energy level, improve your mood and help you regulate your body temperature, which is especially important for those outdoor DIY projects you do in the summer.


    When you’re not thirsty, your DIY task might be just a bit more enjoyable. Now you can focus on making your home beautiful rather than fighting off aches and pains or feeling woozy because you got overheated. Healthline shares more signs and symptoms of dehydration so you can stay healthy.

    Best water bottles for home improvement

    Many different liquids can help you stay hydrated – milk, tea, juice, sports drinks with electrolytes – but water is often your best bet for all-day sipping. Here is some inspiration for reusable water bottles to keep you on task and healthy until the job is done.

    Oversized water bottles

    How much you need to drink can vary on your sex, activity levels, weight and more, but the general rule is to aim for eight ounces of water eight times a day. That’s 64 ounces, meaning this half-gallon jug from SOXCOXO has you covered. There’s a handle and carrying strap to help you lug this oversized water bottle from one project to the next.

    Flavor infuser bottles

    Does your water need a bit of pizzazz if you’re going to actually drink it? Then try a water bottle with a built-in infuser. Prevention named the Hydracy Fruit Infuser Water Bottle its top pick overall for infuser bottles. A bit of fruity flavor might be exactly what you need to stay motivated.

    Insulated water bottle

    We don’t know anyone who likes plain hot water. Choose an insulated water bottle to keep your beverage icy cold as long as possible and condensation off your hands. We like one like the Hydro Flask Lightweight Wide Mouth Trail Series. Not only is the company known for its insulated water bottles, but the wide mouth means you have plenty of room to add ice cubes. And because it’s lighter than other similar water bottles, it’s easier to clip it to your tool belt and have it close by when you need a drink.

    Durable water bottles

    If you’re working out in the yard, the last thing you need is some dainty, breakable water bottle. Look for one like a Yeti Rambler. The Spruce Eats named this Yeti its most durable and praised the bottle for holding up well when dropped from as high as 30 feet.

    Smart water bottle

    If you just love tech or have trouble remembering to drink, a smart water bottle could be the answer. HidrateSpark tracks how much you’ve had, lights up when it’s time to drink up and connects to an app via Bluetooth.

    Other ways to stay hydrated and cool

    Have a watery snack

    While drinking water is often the quickest way to hydrate your body, you can replenish some of your reserves by eating the same kinds of foods you use to flavor your water. Think berries, cucumbers, lemons and the aptly named watermelon.

    Dress for the heat

    Wear light-colored, loose-fitting clothing. That doesn’t necessarily mean short sleaves or tank tops. Especially with some DIY projects where covering your skin is important for safety, look for shirts like what you might wear to go fishing or in the desert, which are designed to protect you from the sun while still keeping you cool. Don’t forget a brimmed hat to keep the sun off your face and head. Take some advice from Grand Canyon National Park and give your clothes a drink – douse your shirt and hat with water – too.

    Use a cool neck wrap

    It won’t keep you hydrated, but if you’re trying to stay cool, try a wrap like this one from KOOLGATOR. Just get it wet and wear it, no refrigeration necessary. Your hands will stay free for your project and your body stays cooler.

    Take breaks

    When you feel like you’re getting too warm or haven’t had enough to drink, relax. Go indoors or to a cooler room, take a cool shower and recover before getting back to work.

    Avoid peak temperatures

    Schedule your DIY projects, or at least the most labor intensive parts of them, during the morning or evening hours when it’s cooler.

    For more DIY safety tips, visit the Schlage blog. You’ll find helpful guides to safely completing home improvement projects while pregnant, choosing essential gear for your next project and more.


    How to make a closed floorplan feel more open.

    April 19, 2022 by emily.bailey

    Tuesday, April 19, 2022

    closed layout | Schlage

    Here are 10 ways to decorate any space so that you can enjoy your closed floorplan without experiencing claustrophobia.


    READ MORE

    If you’ve recently decided that an open floorplan isn’t all it’s cracked up to be, you aren’t alone. Whether you’re installing new walls in your current home or looking for a new one with a more traditional closed layout, you might be wondering how to balance privacy with not feeling cramped. Here are 10 ways to decorate any space so that you can enjoy your closed floorplan without experiencing claustrophobia.
    Small living room layout with fireplace.

    1. Remove the clutter

    The more things you put in a room, the smaller it will feel. Take a hard look at your belongings and determine what’s really necessary. You don’t have to be a minimalist or get rid of your most prized sentimental possessions. If you don’t use something or it doesn’t really help you enjoy the room, it’s time to remove it.

    2. Manage furniture strategically

    First up, get rid of furniture you don’t need. Less furniture will free up floor space, regardless of the layout. With the furniture you keep, whether it’s a bed, tables, chairs or entertainment centers, make sure it’s proportional to the room. An oversized king bed in a smaller bedroom will make the entire room feel crowded. A six-seat table in a dining room that is now closed off with the wall you added to separate it from the living room might be too tight. Assuming you don’t have a family of six, look to replace it with a smaller dining set.


    You might also look for multifunctional furniture. For example, a storage bench at the end of the bed is both a nice place to stash extra blankets and gives you somewhere to sit while you get ready in the morning. That one piece might help you eliminate multiple pieces such as a chest and a chair.

    3. Keep thinking about that furniture

    Furniture style also plays a big role in how open or crowded a room feels. The Spruce says that Mid-Century Modern furniture is great for smaller spaces simply because it tends to have legs. Legs, especially those that are thinner, raise your pieces up off the ground and trick the eye into thinking there’s more space.

    4. Use natural light

    Natural light is the best friend of small spaces for two reasons. First, any light makes a room feel more open and airier. Second, you can rely less on lamps that take up space. To let in more natural light, choose window treatments that are either more transparent or can be easily raised when you crave the sun. You might also arrange your furniture in relation to windows. Place your home office’s desk under the window, for example, and you’ll get some Vitamin D while you work, rely less on artificial light, possibly reduce eye strain from staring at a computer screen nonstop and even look better on those video conference calls.

    5. Hang mirrors

    We recommend this tip for small foyers all the time. Mirrors reflect light, which, like we said in #4, helps to make almost any space feel larger. Plus, mirrors don’t take up much space. That makes them the perfect solution for banishing a cold minimalist feel without taking up valuable square footage.

    6. Opt for sconces

    Especially if you’ve gotten rid of side tables or chose a smaller night stand, you might be wondering where to put your lamps. Use your wall space. Try sconces on either side of your bed’s headboard, in a narrow hallway or over your desk. You don’t have to rewire or call an electrician if that’s a concern. Within the Grove shows how to combine battery-operated puck lights with traditional sconces for the ultimate DIY hack.

    7. Take advantage of vertical space

    You might be surprised how much wasted space there is above your head. Open shelving is a good way to store items without the bulk of big, heavy bookcases. If you like a built-in look, go all the way to the ceiling and paint your shelves the same color as the wall. Your eye will be drawn vertically to create the illusion of more space.

    8. Match window treatments to your walls

    Similar to painting your built-in shelves the same as your walls, matching your window treatments to your wall color can make your room feel larger. This allows your eye to continue traveling around the room uninterrupted. Instead of seeing a little bit of all here, then a window, then another small section of wall there, your mind will register one continuous view.

    9. Decorate with light colors

    Some designers will debate this, but the general consensus is that lighter colors make a space feel fresh and open. Don’t just think about paint color, though. Remember that dark-wood furniture can also bog down a space, especially if there’s a lot of it. The same goes for dark flooring. If you absolutely can’t live without a daring darker color or print, use it sparingly for an accent wall, bedding or accessories.

    10. Choose removable barriers

    For those of us who didn’t want to or couldn’t add permanent walls for more privacy during the coronavirus pandemic, temporary barriers are a great alternative. Privacy screens, pass-through bookshelves and even simple curtains can be beautiful and functional. They can also be removed when you don’t need them, so if the dining room suffices as a small home office during the day but needs to be more open for family time in the evening, try a room divider that can be added and removed as necessary.

    Our homes should transform to fit our lifestyle, not the other way around. Find more ideas for making your home work for you at the Schlage blog. And if you’re on the hunt for a new place entirely, don’t forget our Real Estate hub with advice on buying, selling and moving into your perfect home.


    How to build an eco-friendly rain garden and protect your home.

    April 14, 2022 by emily.bailey

    Thursday, April 14, 2022

    Rain Garden | Schlage

    Building a rain garden not only boosts your curb appeal, but it can also help you conserve water and protect your home.


    READ MORE

    If you had the chance to fix multiple problems with a single task, would you take it? Of course you would. That’s why we recommend a rain garden as your next outdoor DIY project. While it’s more involved than simply sticking some flowers in a window box, building a rain garden not only boosts your curb appeal, but it can also help you conserve water and protect your home.
    Garden rain boots next to basket and flower bed.

    What is a rain garden?

    A rain garden is a depression in the landscape that collects rainwater before it can enter the sewer system. The depression – typically just six to eight inches deep – is filled with native plants, especially those with deep root systems. Together, these features help to purify water as it percolates into the ground.


    Rain gardens are often planted strategically close, but not too close, to your home to control runoff. Instead of rain running directly from your roofline to your driveway and into the sewer, you are able to redirect it away from your home’s foundation and toward your plants.

    Why should you plant a rain garden?

    Probably the biggest reason people plant rain gardens is to conserve water. As we add hardscaping to your homes – driveways, concrete paths, decks – we obstruct the ability for water to re-enter the ground. Surprisingly, the typical lawn can also be an obstruction. According to Groundwater.org, “Compared to a conventional lawn, rain gardens allow for 30% more water to soak into the ground.” And while rainwater is running off our roofs and over driveways, it’s taking dirt, chemicals and other pollutants with it. That means the untreated water entering the sewer system can then empty into our natural waterways, polluting them in the process. A rain garden can filter out up to 80% of that sediment.


    In addition to naturally cleaning the water, rain gardens can help you use less water in the first place. The EPA reported in 2017 that Americans use more than 9 billion gallons of water outdoors every day, and a majority of that is for landscape irrigation. With a rain garden, there’s less reliance on sprinkler systems or your hose to keep your plants hydrated. Reducing water use is a good step toward becoming more sustainable for the environment.


    Finally, rain gardens can actually help protect your home. When water pools around your house, you might find extra moisture in your basement. Your sump pump might have to work extra hard (what happens if it fails while you’re out of town?). Or, worst case scenario, that water starts to erode the concrete and mortar of your foundation.

    How do you build a rain garden?


    1. Select a location that’s lower than your home so you can use gravity to direct rain runoff away from your downspouts or driveway. The garden should be at least 10 feet way from your house. Remember, we want it far enough away that it won’t damage your home’s foundation. You’ll also want to avoid planting your garden over septic tanks or near underground utility lines.

    2. Create a pathway for the water. This could be a bed of river rock or an underground pipe to funnel the water to the garden itself. Which route you go will be determined by both the aesthetics you’re going for as well as the distance the water has to travel. The farther your garden is from the water source, like your house’s downspouts, the more likely you’ll need to lay underground piping.
    1. Dig your garden. Like we said earlier, it’s usually six to eight inches deep. The actual depth depends on how much rain you get and how quickly your soil drains. You want a rain garden after all, not a pond. The average rainfall should drain away with about 24 hours. This will help keep your plants healthy, your home’s foundation safe and mosquitoes from settling in.

      The overall size of your garden will depend on how much runoff you get. There are guides online that help you calculate if you have a roof of a certain size and average rainfall measures at a certain rate, how much runoff you can expect. If you aren’t into all the math, though, take comfort in knowing that you can simply plant a garden sized to complement your curb appeal. Even if it’s “too small,” it’s still better than nothing.

    2. Choose your plants. You want native species that do well with average to high soil moisture. Non-native varieties require extra water and care and could negate your attempts at being eco-friendly. While the flowers you choose will vary based on your location, consider daylilies, coneflowers and sedge as a starting point.
    1. Plant your flowers. Because your depression has a bowl-like shape, plant the varieties that love moisture the most in the base and those that need less water on the slope.

    2. Maintain your garden. While rain gardens are generally low maintenance once built, it pays to be vigilant, especially the first year when plants are young and still sending out their roots. Many experts recommend leaving a notch on the downhill side of your rain garden so that excess water can run out more easily without uprooting young plants. On the uphill side, some larger rocks or a natural barrier of some kind can slow the water as it comes in and doesn’t wash away your young plants.

      During dry spells, you might need to water your garden occasionally. Fortunately, if you chose native plant species, you shouldn’t need to do this too often as those varieties tend to be fairly drought resistant.

    We use so much water in our daily lives, inside the house and out. The good news is that even small changes can have a big impact on helping the environment. Get started with these sustainable curb appeal hacks at the Schlage blog.


    Small changes at home that make a big difference in the community.

    April 11, 2022 by emily.bailey

    Monday, April 11, 2022

    Community | Schlage

    Schlage put together this list of ideas for ways you can make a difference without leaving your home or needing to rearrange your budget.


    READ MORE

    Since the start of the coronavirus pandemic, we’ve all been looking for ways to make a difference in our communities. When we’re limited in the places we can go or have to tighten our financial belts, though, figuring out what to do can be difficult. That’s why Schlage has put together this list of ideas for ways you can make a difference without leaving your home or needing to rearrange your budget.
    Three friends laughing and embracing.

    Source responsibly

    Whether you’re an experienced DIYer looking for a better way to finish a project or a socially conscious crafter, choosing materials that reduce waste and support the environment is a good way to make a difference.


    1. Instead of buying new materials, see if there’s anything you already own that you can upcycle or use up.

    2. Shop overstock stores that sell supplies that would otherwise end up in a landfill. FABSCRAP is just one example, working to reduce textile waste.

    3. Choose non-toxic and environmentally sustainable materials, such as cork, which doesn’t harm the tree when harvested.

    4. When you finish a project, donate your extra materials and supplies to a non-profit or other organization, even a neighbor. This could include scrap wood, fabric remnants or leftover mulch.

    5. Donate your old furniture or appliances when you renovate. Habitat for Humanity ReStore is widely known. American Council of the Blind and AMVETS National Service Foundation may be other options in your area.

    6. Shop mindfully. Plan your projects, measure twice and only purchase the items you need in the quantities you need. You’ll save money and will have less waste in the end.
    Hardware store owner

    Support independent businesses

    Buy at stores that would benefit the most from your dollars. Even independent businesses often have websites and Etsy stores these days, so don’t forget that online shopping is still a possibility when you want to shop small.


    1. Look for small, independently owned shops, whether it’s for home décor, hardware or gardening supplies. Support the Mom and Pop stores in your area when you can.

    2. Consider making purchases at minority-owned businesses. Get some ideas for supporting BIPOC (Black, indigenous and people of color) businesses at Intersectional Environmentalist.

    3. Support a business with the same values as you. More companies are donating a portion of their proceeds to charitable causes. We spotlighted Conscious Step Socks in our Gifts that Give Back gift guide, but find a company that supports fair trade, equal employment, environmentally friendly manufacturing or anything dear to your heart.

    4. Contribute to a Kickstarter project and support an entrepreneur or artist committed to leaving the world a better place.

    5. Tourism was down 70 percent internationally through the beginning of 2020, according to the United Nations World Tourism Organization. This dramatically impacted museums, theaters, zoos and other entertainment destinations. Whether looking for something for your own home or a present for a loved one, visit their online gift shop.
    Woman smiling from home office

    Shop online the smart way

    Internet browser plug-ins and the settings in your store accounts can help you contribute to important causes. And all you have to do is keep shopping like normal.


    1. Download an internet browser add-on that donates to your favorite organizations while you shop. Gumdrop by Goodshop works a lot like those coupon code sites, but instead of you earning the cash back, it goes to the charity or school of your choice.

    2. Some stores, online and IRL, will donate to a charity just for shopping with them. Amazon Smile is one example. When you register your grocery store loyalty card, you might be able to designate a charity as well.

    3. Many non-profit organizations rely on donations for everyday items. Animal shelters, for example, frequently need paper towels for all those puppy messes. Check the organization’s website or ask if they have an Amazon wish list.
    Mom and young children working in garden.

    Make small daily changes

    Any action can make a difference. The ripple effect can lead to bigger things. Small gestures can make a huge impact on a single person.


    1. Choose reusable instead of disposable or single-use materials. Replace sandwich bags with Lunchskins, plastic takeout containers with glass food storage or paper towels with “Unpaper” Towels.

    2. Eliminate single-use plastics by switching to bar shampoo and soap, buying laundry detergent in boxes rather than bottles and Swiffering with reusable pads.

    3. Shop your own closets and pantry for clothing and food donations. It literally costs you nothing but time, and will it help you achieve those organizational goals.

    4. DIY a beautiful handmade card and write to someone. Send words of encouragement to the elderly or others in group homes, members of the military, families in shelters or frontline workers. Don’t forget your own friends and family who might need a pick-me-up.

    5. Make blankets and donate to organizations like Warm Up, America! A simple blanket goes a long way at homeless shelters, for patients in hospice or children’s hospitals, and at animal shelters. A no-sew blanket like this one from Mom’s Magical Miles makes it super simple.

    6. While we’re thinking of animal shelters, try making DIY pet toys for the furballs while they wait for their forever homes.

    7. Complete a project or clean for someone in your own home. Simply weeding the garden or folding the laundry could make your partner’s day.

    8. Practice self-care. It’s hard to be there for others when you’re feeling overwhelmed and rundown yourself.

    We have even more ways you can benefit your community using your DIY skills on the Schlage blog. Check it out and share your ideas with us on Facebook or Twitter.


    10+ design tricks to create the illusion of a bigger, better home.

    April 06, 2022 by emily.bailey

    Wednesday, April 6, 2022

    Optical illusion decor | Schlage

    We all love a good décor hack, so why not try a sleight of hand with these DIY projects to fool your friends.


    READ MORE

    Interior designers’ tricks of the trade really are just tricks sometimes. Unless you’re paying close attention, what catches your eye in a beautiful home could be an optical illusion. It might be making a small room feel larger or faking a more luxurious lifestyle than you actually have. We all love a good décor hack, so why not try a sleight of hand with these DIY projects to fool your friends.
    Living room with large ornate mirrors.

    1. Curtains

    Window treatments are one of the all-stars of optical illusions. If you want to make a room feel more spacious, choose light-colored and airy curtains instead of heavier drapes. On the other hand, if you want to create a snug bedroom, for example, go for those heavy curtains to feel wrapped in a tight cocoon on coziness.

    How you hang your curtains can also “change” the dimensions of a room. If a window is off center on the wall, install the curtain rod as if it weren’t. Then position the curtains in a way that hides the window frames and gives the illusion of symmetry.
    Similarly, if you have a short wall you want to make appear longer, extend the curtains farther beyond the edges of the window itself. Or hang them nearer to the ceiling than at the top of the frame to create the illusion of height in a room. These strategies will trick the eye, much the same way stripes on clothing can “change” the shape of your body.

    2. Paint colors

    Like curtains, if you want to make a room feel larger, choose a light and airy paint color. Brighter spaces make you think you’re more in the open. But again, if you want that cozy cocoon vibe, choose a darker color.

    To create the illusion of a higher ceiling, use multiple colors with the darker paint toward the bottom and the lighter above. Apply this rule to kitchen cabinets with the upper cupboards one color and the lower ones in a darker shade. This can help to draw the eye upward, making the brain think there’s more space overhead.

    3. Blue porch ceiling

    While you have the brushes out, try painting your porch ceiling blue. By replicating the sky, a blue paint can make the porch feel more open or just reinforce the idea that you’re outside enjoying nature. This can be especially beautiful in coastal areas or if you love some good beach décor.

    4. Hollow core doors

    Sometimes the illusion is less about space and more about adding refinement without busting the budget. Homebuilders install hallow core doors because they’re inexpensive. Unfortunately, they aren’t very attractive either, but you can change that with some simple DIY hacks. Add panels or glass insets, or simply get creative with the paint job to create a whole new look.

    Check out this Schlage blog for more ways to update your hollow core doors so they look more expensive.

    5. Door hardware

    Add door hardware to your bag of style tricks for two reasons. First, it can create a luxurious look for very little effort. When you pair your door knobs or handles to the style of the rest of your home or match the finishes to other accessories like plumbing fixtures or lighting, you create a polished look that screams sophistication.
     

    Second, door hardware can add a decorative touch to small rooms without taking up valuable space. If you want a small room to feel larger, you need to choose your décor wisely and avoid clutter. So when you’re trying to add some visual interest, you want pieces that are both fashionable and functional. The perfect glass door knob, like the Schlage Custom™ Alexandria or Hobson, or a modern lever with a bit of shine can do just that.
     

    6. Curtains instead of doors

    Schlage is suggesting you remove doors? For this hack, yes. Sometimes a room can feel small or lackluster because it’s hard to arrange your furniture. The bed would look perfect on that wall, but then it blocks a closet door from opening. Replace the door with a curtain so that swing radius is no longer a concern. Using a lighter fabric can also help remove any claustrophobic feelings you might be having.
     

    7. Furniture scale

    In minimalist Scandinavian and Japandi styles, you’ll rarely see oversized, bulky furniture. This is because it can make a room feel crowded and cluttered. Regardless of the size of your space, make sure your furniture is proportionate to the rest of the room.

    If you’re trying to make a space feel larger, look for furniture with a sleeker silhouette, wood with lighter finishes and pieces on narrow legs. This modern bedroom suite is a great example of how thin legs lift the pieces off the floor, making them feel less heavy and bringing the eye upward to create the illusion of more space.

    8. Lighting

    We keep talking about bringing the eye upward. That is exactly what happens with uplighting. If you have a low ceiling, choose light fixtures, such as this adjustable floor lamp or sconces, that shine up.

    However, if you want to direct people’s attention to a particular item – perhaps a luxurious piece of art – or create a close, moody ambience, choose downlighting. Think of it as a spotlight on a dramatic stage.

    9. Mirrors

    It’s called smoke and mirrors for a reason. Reflective surfaces can play all kinds of tricks on the mind. We often recommend mirrors for your entryway because they tend to be small, narrow spaces. Fortunately, a mirror can reflect light and make the space feel more open. A mirror opposite a window so that it reflects the open outdoors can be especially effective, not to mention good feng shui.

    10. Open stairways

    When updating stair railings, choose your spindles wisely. Bulky wooden spindles spaced closed together are common in traditional homes but will make a space feel more closed off. If you’re looking for a more open vibe, choose thinner spindles or even cables or glass, which can be stunning in modern and industrial homes.

    11. Expansive art

    Create an escape with wall art that makes you think of something expansive. An oversized image – it could be a painting, wallpaper or a decal – of a beach scene or outer space can trick your mind into thinking of distant horizons instead of just another wall. Some abstract art with no clear beginning or end can have the same effect.

    12. Furniture arrangement

    If you have a small space but a beautiful view like this one, take advantage of it. Instead of facing furniture to the center of the room, make the windows your focal point. You’ll feel like you’ve brought the outside in while reading or chatting.

    13. Declutter

    The cheapest trick in the book is getting rid of things you don’t need. There’s no secret here and no need to get out power tools or knock out walls. To make a space feel more open, remove the clutter and get organized.

    Find more style and design trends at the Schlage blog. And if you’re looking for more tricks, check out some of our favorite DIY hacks from TikTok.


    Hop into spring with these Easter porch décor ideas.

    April 02, 2022 by emily.bailey

    Saturday, April 2, 2022

    Easter porch decor | Schlage

    Even if you aren’t sure you’re able to change your home’s energy, you can be confident that these suggestions will still give your curb appeal and entryway a boost.


    READ MORE

    Spring is the season of new beginnings, from blooming flowers and baby animals to fresh outlooks on what we want for our lives and home. It’s a time to add bright colors and renewed energy to our décor in hopes of adding joy to our daily lives. Whether you’re simply welcoming the new season or trying to lure the Easter bunny to your front door, try some of these spring curb appeal ideas.
    Orange front door with Easter wreath and matte black Schlage door handleset.

    Rain Boot Vase » On Sutton Place

    Few things say “spring” like a beautiful bunch of blooming flowers. To take your porch décor to the next level, though, arrange them in a container that’s also inspired by the season. On Sutton Place packed flowers into rain boots, but you could also hang an upside-down umbrella on your door and fill it with your favorite blooms, or use a watering can as a planter.


    Get the look, Schlage Camelot Handleset and Georgian Knob in Aged Bronze.

    Decoupage Egg Garland » Purely Katie

    Garlands aren’t just for Christmas, as Purely Katie shows us here. She decoupaged some foam eggs and attached them to store-bought greenery for this easy craft. When choosing your garland greens, though, be sure to pick something light and delicate looking instead of winter evergreens. You can then hang this along stair railings, around your door frame or on a mantel if you want to bring your spring décor inside.


    Garland isn't the only way to elevate your front door. Check out the Schlage Camelot Front Entry Handleset w/ Accent Lever, Satin Nickel.

    Bunny wreath » Sprinkle some fun

    You probably saw a similar DIY snowman wreath back in the winter, and now Sprinkle Some Fun has the spring version – a grapevine bunny wreath with sweet little flowers and a ribbon bow to complete the look. Hang this on your front door or any wall, inside or out.

    Reclaimed Wood Easter Bunny » My Recipe Confessions

    Using reclaimed wood for DIY projects is always a good idea, especially if you’re looking for ways to reduce waste while also keeping your home looking great. This tutorial shows us how to make an adorable bunny out of scrap wood. It also includes a stand, so you can move it around – from your porch to the front yard, maybe peeking out from behind the bushes – and save the door for your favorite spring wreath.

    Rainbow Egg Wreath » The House that Lars Built

    If you’re into bright colors and less traditional wreaths, this one’s for you. Grab some crepe paper in multiple colors, papier mache eggs and a wreath frame, and you’re on your way to this customized door décor. We love the versatility of this wreath, too. The colors are entirely up to you. Plus, it’s a subtle nod to Easter, perfect if the holiday décor isn’t really your thing but you still want to be festive.

    Easter Egg Topiary » Celebrate and Decorate

    Topiaries and container gardens are very popular right now. They’re so easy to transition from season to season so your curb appeal is always on point. Celebrate and Decorate shows us how to make a topiary with giant eggs and artificial flowers. It’s a fun take on an otherwise traditional approach to curb appeal.

    Upcycled chick planters » Parents

    Who cares if the chicken or the egg came first when you have something this cute? Despite being on the smaller side for porch décor, these chicks would make the perfect addition to a patio table or windowsill that needs a little seasonal touch. Fill them with your favorite artificial flowers or something from your garden.

    Wooden Yard Carrots » Instructables

    Even brown thumbs can enjoy giant carrots this year! If you have some carpentry skills, we recommend this garden DIY. You don’t need a big yard or vegetable patch, either. Try tucking these into larger container gardens, along walkways or around your mailbox, too.

    DIY Easter Door Mat » The 2 Seasons

    Don’t forget the real estate on the ground, especially if April showers are common in your area. The 2 Seasons’ stenciled bunny door mat is simple enough you can probably recruit your kids to put their personal touch on it. The hardest part will be wiping your shoes on those adorable little cotton tails.

    Easter Bunny Door » East Coast Mommy

    Lastly, try decorating the door itself. Just a few paper cutouts transform this entranceway into a giant bunny that’s sure to make everyone smile. We don’t think you have to have a white door to pull this off, either. Embrace whatever color you have or pick a different critter for an entirely different look. That yellow door is just asking to be a friendly chick, coral or turquoise doors could be Peeps, or a green door could transform into a bed of grass for stick-on Easter eggs.


    Explore other ways to dress up your front door, like the Schlage Touch Century Deadbolt, Electronic Keyless Entry lock, Satin Nickel.

    Find more budget-friendly spring porch décor ideas at the Schlage blog. You can also hop over to Instagram and Pinterest for a basketful of inspiration.


    How to safely store and dispose of paint, stain and other DIY supplies.

    March 10, 2022 by emily.bailey

    Thursday, March 10, 2022

    Paint disposal | Schlage

    We’ll show you how to safely store your paint so it lasts longer and how to properly dispose of it without harming the environment.


    READ MORE

    One the toughest home improvement questions you may ever have to answer: How much paint do I need? It turns out we aren’t very good at calculating the amount of paint it takes to redo a room, even with online calculators to help us. The Product Stewardship Institute estimates that about 80 million gallons of household paint go unused in the U.S. each year. Many of us will hang on to some of that extra paint for future jobs or to touch up the walls after our toddlers have their way. But what about the rest? Below, we’ll show you how to safely store your paint so it lasts longer and how to properly dispose of it without harming the environment.
    Two people dipping paint brushes into paint cans.

    How to store paint to make it last longer

    The less air that reaches your paint, the longer it will last. That’s why many experts recommend putting it in a smaller container such as another can or jar. Whatever you choose, make sure you can get an air-tight seal with the lid.


    If you’re going to store the paint in its original can, clean the rim and sides of excess paint. Then place some plastic wrap over the opening – this helps create a tighter seal – and replace the lid. Use a rubber mallet to tap the lid back into place securely without damaging it. If you use a regular hammer, you can distort the lid or the rim, preventing it from closing properly. True Value also recommends storing the can upside down.


    Store your paint in a cool, dry place like a cabinet or basement. Too cold of a location will cause the paint to separate and become unusable if it freezes. Too hot of a location or one in direct sunlight will cause the paint to deteriorate more quickly. Also, avoid storing paint directly on the ground where moisture can cause the bottom of the can to rust and damage the paint.


    Label your paint clearly so it’s easier to find and use when you need it again. The original can will likely have the color on it, but you can use a permanent marker to write the date and how it was used previously. Then, when you want to do touchups later, you won’t be guessing which paint was used in the living room and which was the dining room.

    Used paint brushes

    How to dispose of paint and wood stain

    Latex paint

    You have a few options for disposing water-based latex paint. You can take it to a hazardous waste facility or add a drying agent to it before putting in the trash. If you choose the second option, add kitty litter or a commercial paint hardener, then let it sit out and harden for a few days. Make sure it’s somewhere kids and pets can’t get to it. Once the mixture is the consistency of oatmeal or firmer, put it out on the curb with the rest of your garbage. Double-check your local regulations to make sure this is legal in your area first.

    Oil-based paint

    Oil-based paint cannot be thrown away, no matter what you do to it first. Take it to a hazardous waste or drop-off center so they can dispose of it properly without polluting the environment. Another great option is to donate extra paint to a local non-profit organization such as a community center, theater, school or place of worship. The same goes for pretty much any item on this list.

    Spray paint

    Only recycle cans of spray paint when you’re sure they’re completely empty. A half-full can still contains a great amount of pressure and can explode. Spray a piece of cardboard to be sure the can is completely empty before recycling it. Learn more about disposing aerosol cans and other common household items.

    Wood stain

    In many cases, you dispose of wood stains the same way you would paint. However, check your local regulations first. Your community may require you by law to drop off leftover stain at a hazardous waste facility for proper handling. Used rags can usually be thrown in the trash once they’ve completely dried.

    Varnish

    Used to seal and protect wood, varnish is considered a hazardous material. As such, it should be disposed of by taking it to a drop-off center. It is flammable, so don’t throw it in the trash.

    Empty room set up with paint supplies, drop cloth and step ladder.

    How to dispose of painting supplies

    Brushes, rollers and pans

    Most high-quality brushes and rollers can be reused if you clean them properly after each use. When it is time to dispose of them, follow the instructions for paint disposal. Supplies used with latex paint can be thrown in the garbage after they’ve completely dried. If you used oil-based paint, take them to the waste disposal facility with your leftover paint.

    Drop cloths

    Plastic drop cloths or cardboard should not be recycled. That type of plastic typically isn’t accepted by most curb-side pick-up recycling programs. And if it’s covered in paint, it probably can’t be processed anyway. A canvas drop cloth can be reused more often and is the better choice for reducing waste in the first place. When it’s time to retire it, though, you’ll probably want to take it to a special collection location, especially if you used oil-based paint. HGTV also has a fun alternative for turning old canvas drop cloths into wall art.

    Paint thinner and paint stripper

    Leftover paint thinner, used paint stripper and used rags should be disposed of at a hazardous waste center. Do not throw them away as they are highly flammable. Do not pour them down the drain. This can cause groundwater contamination. Bob Vila also has tips for storing paint thinner for reuse.

    Dirty paint water

    Once you’ve cleaned your brushes, you’ll be left with a bucket of dirty paint water. What do you do with that waste? Let the bucket sit in a warm spot until the water evaporates. Make sure to keep it away from children and animals. You can then peel off the paint residue left at the bottom of the pail and throw it away.

    Let the Schlage blog help you find other ways to use up that leftover paint. Get inspired with these low-cost interior home projects.